pseudoClassAndElement
CSS Pseudo-class & Pseudo-element#
CSS Pseudo-class
The CSS Pseudo-class is a keyword with a colon preceding it, added to a selector and used to define the special state of the selected selector.
Syntax:
There are many Pseudo-class in CSS but in this workshop, we will talk about the most used are as follows:
Basic Pseudo-classes#
- hover
- checked
- enabled
- disabled
- first-child
- last-child
- nth-child(n)
- :hover Pseudo-class: used to apply style on the selected element after the user hovers the cursor over this element, for example:

In this example: when you hove the cursor over the specified element, the color will change to white and the background-color will change to black.
- :checked Pseudo-class: matches the checked selector (used for: radio button, checkbox button, and option element only), for example:
In this example: if any input with checkbox type was Checked or if the user clicked any checkbox input, this input will move 30px to the right.
Read more about the Attribute selectors (The selector that used in the example) here
- :enabled Pseudo-class: matches the enabled selector (the selectors that you can take an action on it, mostly with inputs), for example:
In this example: if any input with text type was Enabled will be with a gray background.
- :disabled Pseudo-class: matches the disabled selector (not enable: the selectors that you can't take any action on it, mostly with inputs ), for example:
In this example: if any input with text type was Disabled will be with a black background.
- :first-child Pseudo-class: matches the first selector in the same parent, for example:
In this example: this style will be applied to every first h1 element in the same parent.
- :last-child Pseudo-class: matches the last selector in the same parent, for example:
In this example: this style will be applied to every last element that has the class-1 class in the same parent.
sometimes you need access to an element, but not the first or last element, maybe the second, the third, or the fourth ...etc. How you can do it?
- :nth-child(n) Pseudo-class: take an argument(n) and matches the selector that is the nth-child, for example:
In this example: this style will be applied to every p element that is the Third element in the same parent.
The :nth-child(n) not only take a number, you can read more about it here
We just talked about the basic pseudo class, if you interested you can read more here
CSS Pseudo-elements
The CSS pseudo-element is a keyword with two colons preceding it to differentiate them from pseudo-classes, added to a selector and lets you style a specific part of the selected element.
Syntax:
The pseudo-element in CSS, follow to learn it:
All Pseudo-element:#
- first-letter
- first-line
- selection
- after
- before
- ::first-letter Pseudo-element: apply styles to the first letter in the element selected.
In this example: this style will be applied to the first-letter within every p element on your page.
- ::first-line Pseudo-element: apply styles to the first line in the element selected.
In this example: this style will be applied to the first-line within every h3 element on your page.
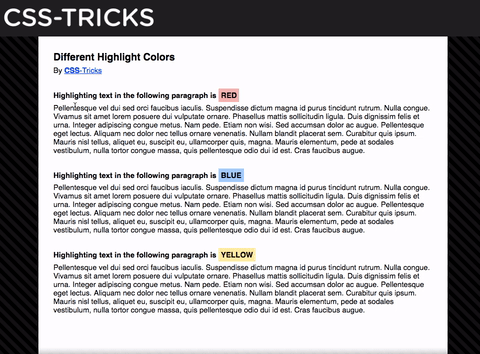
- ::selection Pseudo-element: apply styles to the part of an element that has been highlighted by a user, it's great for matching user-selected text to your site color scheme.
In this example: this style will be applied to the part that you selected in all p elements on your page.
- Other Examples
- ::after Pseudo-element: insert new
contentafter the selector, without adding new content in theHTML, for example:
In this example: you will see Hello from CSS after every h3 element in your page.
- ::before Pseudo-element: insert new
contentbefore the selector, without adding new content in theHTML, for example:
In this example: you will see blue circle before every p element in your page.
Notes:
- This Pseudo element should contain the "content" property.
- The content prop may be empty, string, or image, you can read more about it here
- using
afteryou can make a style not insert text only - the result appears as a Dom element but actually it's not a Dom element.
- It is inline by default.
What's the difference between the Pseudo-classes & Pseudo-elements?
| Pseudo-classes | Pseudo-elements |
|---|---|
| sets style properties for an element when the element is in a particular special state | styled some specific parts of the elements. |
| use to style element that already finds in the HTML elements | use to create elements that not found in the HTML elements |
Finally: Can we combine Pseudo-classes and Pseudo-element, Why not?
You can combine between it by this syntax:
Try it